
I’ve been working on the harbor area lately. There’s a fair amount going on here. The seawall is built, and I’ve painted the harbor bottom. The trick is to make a thin application of material look like deep water. The total ‘water’ depth will be maybe 3/8″.
I’ve never modeled water, and while there’s a copious amount of information available, very little of it speaks to modeling deep water. Most of the hobby press devotes time to modeling streams, lakes, rivers, and other relatively shallow bodies on land. Capillary action is my primary concern, and the fix for that seems to consist of adding scenery material to cover up the creep. That’s not an option with pilings and seawalls. I’m OK with a certain amount of creep, and I’ve seen some excellent modelling of shorelines in which the capillary action produces a ‘high-tide’ effect, but I need to know what I’m getting in to before I pour. You only get one shot at this. Once the pour is made, that’s it.
There is a school of thought that you can model the water surface with Plexiglas and build structures on top, and I considered this approach. On the plus side, the water can be modeled with a fair degree of fidelity, and no concerns about capillary creep on structures. On the minus side, I’m concerned about my ability to make structures sitting ‘on’ the water look like they are ‘in ‘ the water.
There’s going to be a deck girder bridge and car ferry wharf in the modeled area, so a lot of stuff sticking out of the water. The wharf is especially concerning with all the pilings. Any water simulcra will have to flow around the pilings and self-level. The internet doesn’t offer a whole lot of advice on this, so time to experiment.
I needed a way to isolate various experiments, and I’d thought that 3-way divided paper plates would be a good solution. A trip to the dollar store yielded an even better solution: the chip-and-dip tray:

Yes, it’s a dollar.
About the floor wax. There are a number of sites that tout the ability of Future floor wax to simulate water and ice. Problem is, Future floor was isn’t manufactured anymore. The product was made by SC Johnson, as was the product in the photo. If you’re willing to wait 3-4 days for a thin layer of wax to dry, then maybe wax is for you. If not, then not so much.
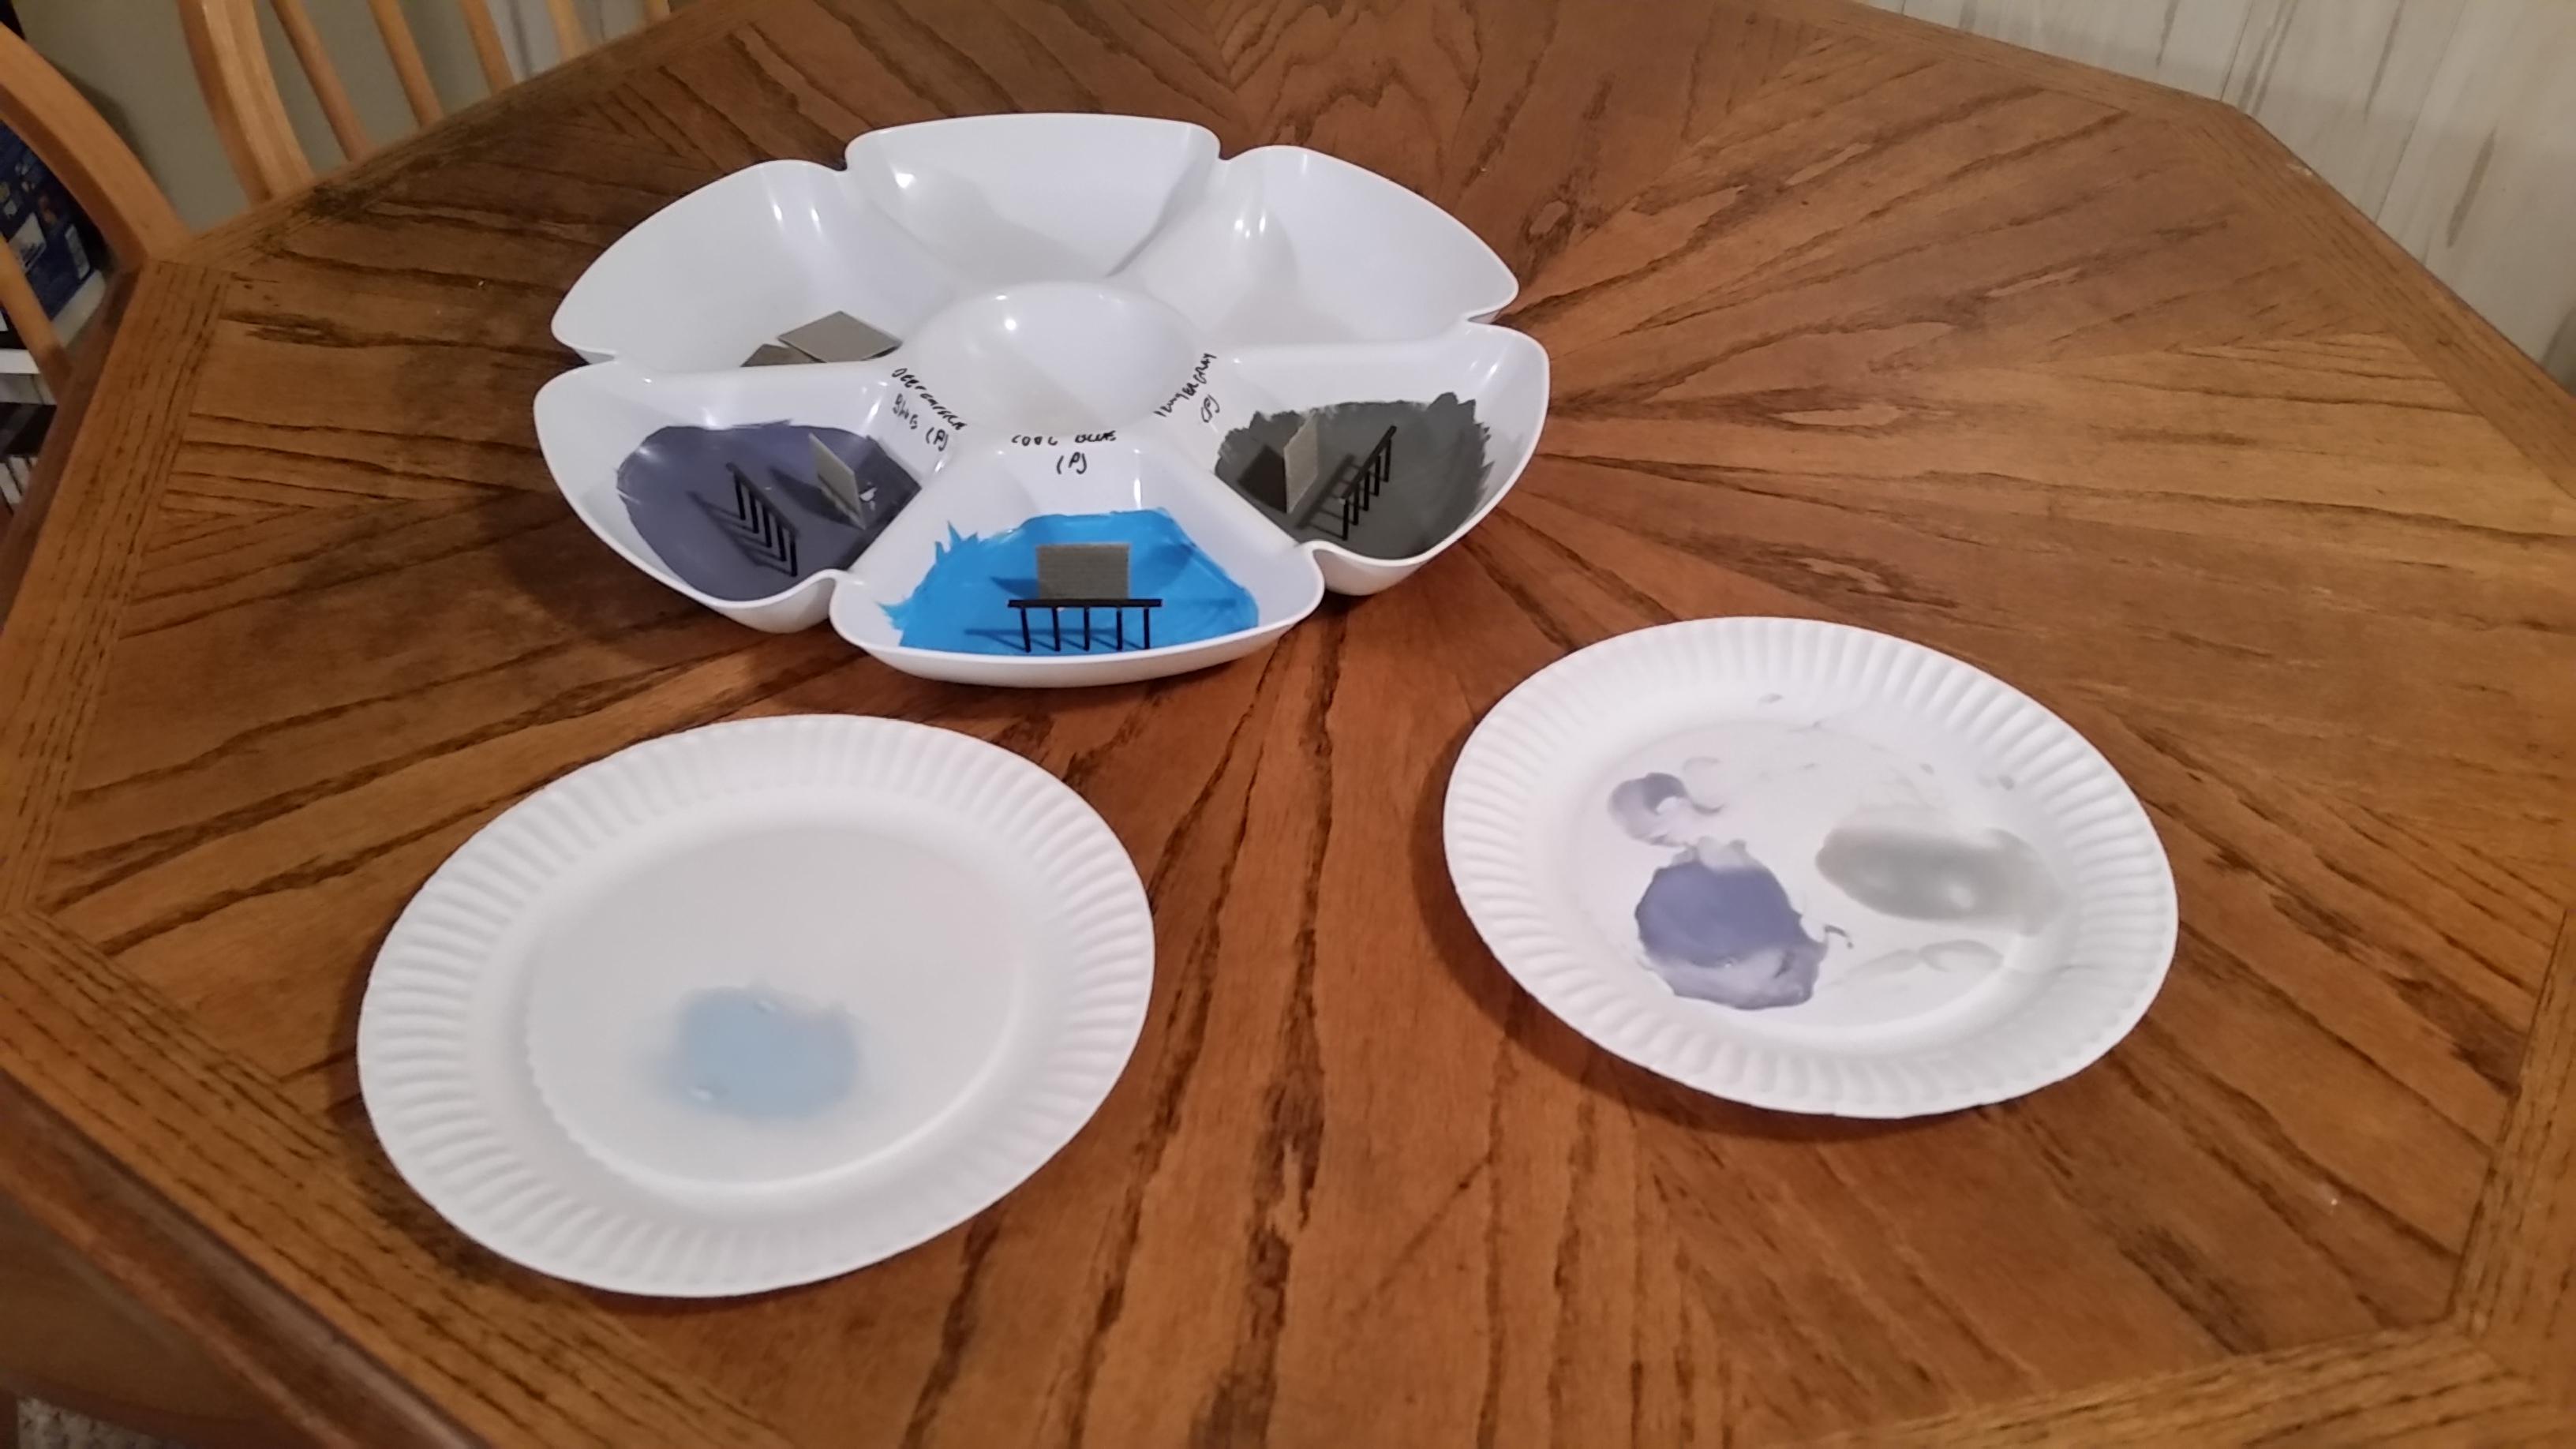
I painted the bottom of the tray with the colors I was considering, then added representative samples of seawall and pilings. I’d built a jig for the pilings along the same lines as the jig for the coal trestle. This was valuable in giving me experience in building the piers: there are going to be a lot of them. So a good exercise in building the piers. I’d prefer a faster way to do this, but for the project size the current method will serve. I figure I can build all the piers in a football game, or a post-season baseball game.
The paper plates contain puddles of acrylic medium (gloss) tinted with various colors. The left side is tinted with Cool Blue acrylic, and looks to be the best candidate. The corresponding color on the chip tray looks like a swimming pool, so may not be the best choice for bottom coloring. From the left I used Deep Imperial Blue (latex), and Pewter Grey acrylic. The latex appears to retard the drying time of the medium, perhaps indefinitely. I noticed that the latex tended to congregate toward the low point of the medium pool. I suspect that’s due to density difference. I used a toothpicks worth of coloring on each sample.
There are model-specific mediums to model water, but they’re bloody damned expensive. I’m not exactly trying to do this layout on the cheap, but I see no need to throw the bank at it. Art supplies aren’t cheap, either, but a good deal less expensive than purpose-made items.
Bridges
I’d planned a girder bridge in the harbor area, and mocked one up out of cardstock:

The idea here was to get a feel for what would be required as far as lengths of girders and the general appearance as well as pier placement.

My initial idea was to make this a ballasted deck girder, mostly because it would be the easiest to model. There’s a clearance problem with the car pier, so my working model now is to extend the wharf the width of the three tracks, and extend the bridge from that. I don’t think common practice was to ballast a deck girder extending from a pier, so I may have to model the bridge structure entire. Not a daunting prospect, but more time and effort than originally planned. On the other hand, it would look very cool. I may just say to heck with it and ballast the girder anyway,

You must be logged in to post a comment.